Saturday, December 20, 2014

Risk: Legacy - Setting the Stage for a New Age of Conflict

Risk: Legacy, a game in which every decision players make can alter the battlefield forever. There is no turning back. What happens can never be undone. And it will provide a game of Risk like no other.

When you are invited to permanently sign a board understanding that the events that take place are by your own doing and those of your comrades for this journey, you know it's a serious game. That the stories that will be born of Risk: Legacy will be stories to remember.
"We, the undersigned, take responsiblity for the wars that are about to start, the decisions we will make, and the history we will write. Everything that is going to happen is going to happen because of us."
~Andrew Malic
~Andrew Hoffman
~Stephen Jackson
~Vincent Malic

The wars started on the following date: 12/19/2014"

***
New Superpowers Arise
Setting up a game of Risk: Legacy is unlike any other form of Risk I have had the pleasure of encountering before. Once something is done, it is effectively set in stone and there is no reversing it. 

Each faction is given a permanent power from a set of two -- a pair of stickers in which one is placed on the faction card and the other disposed of, never to be used. The permanence of it all is equally as exciting as it is intimidating.

In true table-top gamer fashion, we all agreed that setting up the elements of the game randomly would make the first game truly interesting. With each related factions' pair of powers, we rolled a D6 to determine every permanent bonus.

The Saharan Republic: 
You can make your maneuver at any point during your turn.
When making your maneuver, you may maneuver between any two territories you control, even if they are not connected.
Imperial Balkania:
When recruiting troops, round up when dividing your territory and population by 3, not down.
You still draw a resource card at the end of a turn where you expanded into 4+ territories, even if you didn't conquer a territory.
Enclave of the Bear:
The defender subtracts 1 from his lower defense die in the first territory you attack during your turn.
If your attack roll is a natural three of a kind, and at least one defending troop is defeated, you conquer the territory. Remove all defending troops.
Die Mechaniker:
Your starting HQ is always treated as FORTIFIED when you defend it.
If your defense roll is two natural 6s, that territory cannot be attacked again for the rest of the turn.
Khan Industries:
At the start of your turn, place one troop in each territory that has an HQ you control.
When drawing a territory card, you may place one troop into that territory if you control it.

***
New Resources Discovered
The next stage of our set-up in Risk: Legacy was determining which twelve territories would be the most resourceful at the start of our New Age. Each territory starts with a resource value of one, but before the game starts twelve will be given an extra value increasing their worth.

Again, as before with our above factions, we decided this at random by each taking turns and pulling cards from the top of the shuffled deck.
Alaska
Scandinavia
Mongolia
Eastern Canada
Iceland
Argentina
Western Australia
Russia
Western Europe
Peru
Japan
Great Britain

***
The Lines Are Drawn, The War Begins
The Board has been set. Factions are decided, and a battle for the New Age begins.

Friday, December 19, 2014

A Lack of Activity

I apologize for the apparent and obvious lack of activity on the blog! As a student in college, it has been quite difficult to get material up and running, but as the holidays pass and the next semester gets rolling I'll be getting more articles up -- even if it means it's just talking about available units in various games.

Thursday, November 13, 2014

Oarai Girls High School vs. St. Gloriana Girls Academy

The match-up between Oarai and St. Gloriana is the first sensha-do battle that our main characters of Girls und Panzer (with the exception of Miho) participate in, and their utter of lack of skill really shows in the fight (as if the ridiculous paint schemes pictured above wasn't already enough of a hint).

For the scrimmage between the two schools I've pointed the Oarai vehicles in their lowest experience level for obvious reasons. The Panzer IV ausf D, however, I pushed up to Regular as Miho -- an experienced tank commander -- justifies that they perform somewhat better than the rest of the team.

Oarai Girls High School
- Regular Panzer IV ausf D: 135 Points
- Inexperienced Panzer 38(t): 108 Points
- Inexperienced Type 89B: 100 Points
- Inexperienced StuG III ausf F: 184 Points
- Inexperienced M3 Lee: 176 Points
Total: 703 Points

Low, low, low points. The hodgepodge of tanks and lack of experience puts Oarai at 703 which is far less than half of the normal points I play in Tank Wars.
St. Gloriana Girls Academy
- Veteran Churchill VII: 522 Points
- Regular Matilda II (x4): 620 Points
Total: 1,142 Points

The Matildas alone are almost enough to match Oarai in terms of points. I gave St. Gloriana's Churchill a Veteran rating as it is commanded by Darjeeling who -- as is demonstrated for the rest of the series -- is a very competent commander. The rest of the team, which will be a usual case for the other teams as well, I rated at Regular since most of these crews practice sensha-do literally every day. If they are not Veterans, they are at least good at what they do.

Now, let's talk line-up.

The Churchill alone already spells trouble for our titular characters. As a super-heavy vehicle by Bolt Action terms, it possesses an armor value of 11+ meaning only two Oarai vehicles are capable of penetrating its armor. Even the Matildas prove to be tough targets considering that (under Bolt Action) the Type 89 and Panzer IV ausf D are armed with light howitzers that possess a horrid Penetration value.

Bolt Action vs. Girls und Panzer
As expected, Oarai puts up a better fight than one would predict in the anime. They do lose, however, as much of their amateur experience in sensha-do really works against them. If played out in Bolt Action it would be entirely one-sided. The only thing working in favor for Oarai would be their far superior maneuverability since all of the British infantry tanks possess the Slow rule. On the table-top, if Oarai could score some hits to the rear, they could stand a teeny chance of leveling the playing field. They would have to rely almost entirely on Pin markers caused, but even that would be a struggle considering the Inexperienced level of four out of five crews.

Wednesday, November 12, 2014

Girls und Bolt Action

Not sure how many of you are familiar with the anime Girls und Panzer, but its a great show made by Actas with perhaps one of the most ridiculous premises I've ever encountered. In this alternate reality, Japanese schools (which, for some apparent reason, have been built into these gigantic city-sized aircraft carriers) practice a war game sport known as sensha-do (literally, the way of the tank). It's a fun story where these high-schoolers ride around in WWII-era tanks and fire dummy rounds at each other in a mock-form of armored warfare. If you haven't seen it and you're a fan of anime, I highly recommend it.

Now, since all of the tanks featured in Girls und Panzer -- with a few exceptions -- did see action in World War II, I have decided to transliterate all of the teams seen in the anime and its OVAs into Bolt Action. Since the release of Tank War, I've set a long-term goal of recreating every team in miniature form and this will be an ongoing project that I will cover on this blog. 

As of right now, however, all I have done is point up each team for a side by side comparison to see how each match in the show lined-up. For the most part, I've assumed all tanks to possess Regular crews excluding character vehicles which I have pointed in their highest form. I will analyze and discuss each match-up in order of their chronological occurrence in the show which I have listed below:

- Oarai vs. St. Gloriana Scrimmage
- Oarai vs. Saunders
- Oarai vs. Anzio
- Oarai vs. Pravda
- Oarai vs. Kuromorimine

Wednesday, November 5, 2014

Bolt Action Army Overview: The Kingdom of Italy

Regio Esercito
The Kingdom of Italy has become the butt of innumerable jokes for its characteristically poor performance during the Second World War and while that is true, Italy cannot be overlooked as a playable faction for the table-top game of Bolt Action. Warlord has done a great job of balancing out each faction -- even the minor military factions in the war such as Poland and even Romania. If they fought in World War II to some degree, they are playable!

Pros
The Italians in Bolt Action -- believe it or not -- are great defenders. Whenever a mission is rolled that involves an offensive and defensive side, the Italians can force a re-roll if they did not win the roll-off to choose defenders. As an Italian player, that's an option you always want to take. Your army bonuses are tailored towards defensive games and that's where you'll see Italians perform their best.

They get some great infantry options. Bersaglieri and Paracadutisti are almost necessary options to take. They possessed great moral and are geared towards mobility and holding objectives. Even San Marco Marines, Alpini Infantry, and Colonial Troop Sections are never bad options. If you need a cheaper choice in infantry, do not overlook the Camicie Nere. With them you are literally rolling a die to see how good they are and, while it seems crazy that there is a 33% chance that they're terrible, the odds are equally in your favor that they will be amazing.

Cons
Italy probably has the worst tank options in Bolt Action. While it's not likely you'll ever need to field more than one vehicle, all of their tanks and SPGs have the Vulnerable special rule due to their riveted armor. Their standard medium tanks -- the M13/40 and M14/41 -- are great against infantry, possessing three MMGs, but don't count on them being able to take out any enemy armor -- because they are terrible at it.

If you really need some anti-vehicle, Semoventes are what you're looking for. They were designed to punch through tanks, but -- just like their tanks -- they are Vulnerable due to their riveted armor. It's always necessary to keep them in the back-line picking off what you need to pick off.


Tuesday, October 28, 2014

Axis vs. Allies

Hey everyone! In the upcoming weeks I plan on going through the forces of Bolt Action and give some descriptions as well as gameplay mechanics. This will be more restricted to Bolt Action and not Tank Wars because, while they are part of the same game (similar to Warmachine/Hordes), there are differences. If you would like to know more about Tank Wars, comment below and if there is enough interest I would be more than happy to do another set of posts geared towards Tank Wars. Andrew and I will also start covering gameplay, in general, of Bolt Action to give you a better understanding of how the game is played and the best place to start if you want to get involved such as costs, starter sets, activation dice, etc. (WARNING: I will not be held liable for the amount of money you will want to spend on Bolt Action!) 

If you have any questions or comments, leave them below and may the dice gods be in your favor!

Sunday, October 26, 2014

Upcoming Warhammer 40K Campaign: Inquisition War

Inquisition War

The Crucis sector Inquisitorial Conclave has met at the sector capital of Ganesha for the trial of Invicta Regis-Lann. The scion of a powerful trading house, Invicta had become an influential member of the Conclave and the leader of the Radical Xanthite faction. Once one of the most effective Inquisitors in the Crucis sector, Invicta’s methods gradually grew more and more extreme, culminating in the Exterminatus of three Imperial worlds, a subsequent warp rift and a daemonic incursion that caused the loss of an entire sub-sector.

Invicta was to be tried in-absentia for her crimes of heresy. However, Invicta had many powerful allies, mostly other Radical Inquisitors, who spoke on her behalf. The trial brought old rivalries within the Conclave to a head, and there was a great deal of strife and commotion, particularly because Invicta refused to appear there to defend herself. Not surprisingly she was declared Excommunicatus Traitoris. The Conclave instructed all loyal Inquisitors to seek the prosecution of her sentence. This caused a number of Radical Inquisitors to walk out. Then, with the Conclave already on the verge of a serious schism, a huge explosion destroyed the meeting hall.

The surviving members of the Conclave blamed the Radicals that walked out. The Radicals declared the whole thing a plot against them. Both sides begin marshaling their forces and battle lines were drawn.

The Grand Master of the Crucis Conclave then summoned Inquisitor-Lord Rayle Karalis, who was once Invicta’s mentor, and charged him with the capture of the condemned renegade. Years ago, Karalis had executed Invicta’s lover for heresy, though some whispered he was secretly jealous. Perhaps it was this act that pushed Invicta into the arms of the Great Enemy and led things to such a sad state of affairs, or perhaps not. Either way, Invicta is lost and Inquisitor Karalis must bring her to justice. Yet both Inquisitors have many supporters and allies, and this terrible war has only just begun.

It is a war that will start in the shadows but come to engulf the entire sector!

Inquisition War is a narrative campaign presented by the 40K Fight Club, Ordo Pacificus Chapter, that will be run beginning in January 2015 and continue for up to one year. The campaign will have two components; a Kill Teams and a regular 40K games. Campaign games will take place on Thursday and Saturday nights each month. Registered players will also meet one Saturday each month to play in highly narrative games of Warhammer 40K. Both types of games will have a strong story and character focus. Players will also be able to play games outside of the monthly group games that count toward their side’s progress.

The overall narrative concept is that a war between rival factions of the Inquisition has broken out in the embattled Crucis sector of Imperial space. The combatant factions of the Inquisition divide into roughly two groups, the Puritans and the Radicals. The Puritan Inquisitors have the resources of the Imperium to draw on as they try to destroy their hated rivals, the Radicals.

The Radical Inquisitors have always walked a fine line between loyalty and heresy. Pushed to extremes, the Radicals may call upon frightening allies – xenos races ever ready to encroach upon human territory. These alliances only confirm the attitude of their Puritan enemies. However, sector politics being what they are, some Radicals may find support among otherwise loyal Imperial power bases in the sector whose political or religious differences are enough to bring them to a Radical Inquisitor’s banner.

A third faction exists – the Renegades. Renegades are Inquisitors who have already been declared beyond redemption – Excommunicatus Traitoris. The Renegade Inquisitors’ existence is driven only by the desire to cause as much havoc as possible before the Imperium, or their own so-called ‘allies’ destroy them. These traitors have no qualms about allying with the forces of the genocidal Necrons, the forever-damned forces of Chaos, or even the implacable Tyranids.

Sunday, October 19, 2014

Down Range: Fighting Voidraven Bombers

Tank Hunters

The Voidraven is designed to bring heavy support firepower to Dark Eldar forces on the ground. Carrying a variety of devastating weaponry, Voidravens strike fear into their enemies as they swoop down at supersonic speeds from the skies and supported by squadrons of Razorwing fighters.

Kaboom.
These things pop Armor 14 tanks like watermelons.

Armed with a pair of void lances, once a Voidraven comes on the board SHOOT IT DOWN -- especially if you're playing Guard. Void lances have the same profile as a lascannon with one important caveat: it's a lance weapon. That means all Armor Values above 12 now become 12. So Leman Russes are, effectively, 12 - 12 - 10 and the ever-so-invincible Land Raider is just 12 all around.  At Strength 9 that means the Voidraven is blasting your tanks with glancing hits on 3 and penetrating hits on a 4+.

It's a real relief knowing that it doesn't possess the Strafing Run special rule, because that would have made the Voidraven horrendously good at destroying ground-based vehicles. Despite that, it is still a crazy good tank-killer as it hits on a 3+.

Fortunately for those of us seeing these things flying in on us, they do have terrible Armor at only a value of 10, though it does posses a 4+ Jink save (3+ with upgrades). In most cases that means that Vendetta Gunships, lascannon-armed Stormtalons, and Hydras will shoot these to pieces.

The Voidraven is a real threat on the board and, while it is scantily armored, it cannot be ignored. If you leave one alone for a little too long, it'll be too late for you.

Saturday, October 18, 2014

Book Overview: Imperial Knights

Codex: Imperial Knights

Opinion after Reading
What. The. Hell. That is literally all I have to say about this book.

Is this Book Balanced?
No. Absolutely not.

This is about as Pay-to-win in table-top gaming as it gets. A Knight Paladin costs only 375 points? And a Knight Errant is 370? And then you can field up to six of them in a formation and they all count as scoring units? Not to mention Warlord Traits -- specifically Master of the Field. Seriously. If you go into a non-Games Workshop hobby store thinking that Imperial Knights are fair, please get out.

As a Guard player, its disgusting thinking that two of my fully upgraded Leman Russ battle tanks cost nearly as much. And -- let me tell you -- they have no chance against an Imperial Knight moving at a foot per turn armed with a reaper chainsword and enough attacks to kill one Leman Russ outright. Even a Knight Errant's thermal cannon will literally turn my tanks into paste.

My best counter is a Shadowsword at 455 points. 80 more points. Keep in mind that's with zero upgrades. A base Shadowsword is 80 more points than a Knight. And if a Knight gets into close combat -- or even in range with a thermal cannon -- the Shadowsword is screwed.

If you just want to win, feel free to pick up this book. But I guarantee you, if you walk into my store with more than one of these abominations -- you will not find a single person to play with.

Friday, October 17, 2014

Down Range: Fighting Imperial Knights

Massive Behemoths

Imperial Knights are massive war machines that were constructed during the Dark Age of Technology -- representing one of humanity's greatest feats of engineering alongside Titans and super heavy tanks. Often affiliated with a Knightly House or the Adeptus Mechanicus itself, Imperial Knights command any battlefield upon which they stride and possessing enough firepower firepower to level a hab-block.

Lol Games Workshop...
Warhammer 40,000 lore is among my favorite in the science fiction universe, second only to Battletech. Super heavies are impressive models on the field and -- as an owner of two super heavy tanks for my Guard -- I love being able to pull them out and play them.

With that being said, I was not a huge fan of the inclusion of super heavies in normal games of Warhammer. Part of the fun of packing up my super heavies for a trip to the store was knowing I was going in for a ridiculous brawl; a game where dozens of super heavies and thousands of models were being played on the field.

Personally, I think Imperial Knights are utterly ridiculous and -- unless you create an entire army consisting of heavy weapons -- it is likely any normal list for a 40k army will get smashed. I faced one for the first time yesterday and its firepower was so overwhelming that I didn't even manage to make it past turn two.

And if the answer to fighting an Imperial Knight is purchasing my own, than no thanks. I'd rather used the $140 on something else.

I am a fan of Warhammer and I've been playing it for more than a decade, but if this turn into pay-to-win is what GW is now aiming for in their market, I may very well put 40k down for good and find another -- more tactically minded game -- instead.

Thursday, October 16, 2014

Down Range: Fighting the M26 Pershing

America's Heavy Tank

A long-awaited improvement of the venerable M4 Sherman, the M26 Pershing is the heaviest vehicle option for United States forces in the table-top game of Bolt Action. The Pershing was heavily armored and armed with a 90mm gun which made it equal in protection and firepower to the German Tiger I and Panther. The length of its prolonged development meant that it saw little combat leading up to the Allied victory in 1945. It did, however, play a role in taking the bridge at Remagen.

Not to be trifled with...
The Pershing is considerably cheaper than its German counterparts, making it a serious threat to your vehicles on the table. It's super heavy AT gun and heavy armor should make this tank priority one for your heavy hitting units. Line of sight and cover will be your saviors against the Pershing as its long-range means it will command much of the table with its firepower. And, if possible, saturate the M26 with targets -- hopefully it won't be lucky enough to destroy them all before you can get through its armor.

Monday, October 13, 2014

Unit Review: Italian Carro Armato M14/41

Fiat Carro Armato M13/40

The Fiat Carro Armato M13/40 was the main battle tank for the Italian Army during the Second World War and was plagued with a number of design flaws and malfunctions that made it one of the least-known vehicles of the war. It's riveted armor made it easy to destroy and its lack of proper anti-tank weaponry quickly made it an outclassed vehicle by the latter half of 1942. However, alongside its better-armed successors -- the Semovente -- and their smaller brethren in the CV33s, the M13/40 worked well in the early part of the North African campaign.

Assembling a M13/40 for Bolt Action
Warlord's kit for the Carro Armato M13/40 was one of the first kits I assembled for Bolt Action. Having come from games such as Warhammer and assembling numerous Leman Russes, I had it in mind that this project would take some time.

Man, was I wrong!

The Italian M13/40 was a whopping seven pieces (As assembled above). One for the main body, one for each tread, a turret, forward-mounted double medium machine gun, the barrel for its light AT gun, and a door hatch (The kit also comes with the option of making the hatch open). It was one of the easiest builds of my life; even the Hetzer took longer and required more attention.

With that being said, he actual model is very well made even as a resin brick. While I don't imagine Warlord has any plans of making plastic kits for Italy, I wouldn't mind putting my hands on one of these kits again some time in the future.

Thoughts on the M13/40 in Bolt Action
The M13/40 shouldn't really be used for anything other than supporting your other Italian forces. It is not effective at engaging enemy vehicles in the least, but it's armament of three medium machine guns (one turret-mounted, and two hull-mounted) make it great at taking out enemy infantry. Also, it's riveted construction makes it fare more vulnerable to anti-armor weapons so -- if you play Italians -- be sure to keep this thing supported in more ways than one. If you're looking for an Italian vehicle that can engage enemy armor, I would suggest the Semovente instead.

A Step Back from the Battlefield


The Sherman Firefly


The Sherman Firefly is an absolute powerhouse and dominates the battlefield. Being one of the most iconic tanks of World War 2, this beast is the epitome of anti-tank. Instead of the normal cannon of a regular Sherman, the British fitted the Firefly with a QF 17-pounder 76.2 mm calibre anti-tank gun. This led to the Firefly being the go to tank for effectively destroying German Panthers and Tigers. 


Playing The Firefly in Bolt Action and Tank Wars


On the game table, the Firefly has complete command over the entire map. With a range that well clears both sides of the normal 4" x 6" table, the Firefly forces your opponent to really think about how they are going to either get rid of it or hide from it. With the 
17-lb gun this thing is classified as a super-heavy with an amazing penetration guranteeing that if it hits, it will wreak havoc. The downside is that it does sit on a Sherman medium chassis, which, like all other Shermans, can catch fire easily. Luckily, the British have the ability to cancel this. Also, the Firefly lacks a hull-mounted machine gun.

This tank, as you can see, is geared towards tank hunting instead of anti-infantry, which is left for the British Cruisers and light tanks. 


Putting the Firefly Together


The model produced by Warlord Games has not yet been converted to plastic (hopefully to change soon with the awesome work from Italeri), but still is a fantastic resin model with great details. No extra bits were included in the packaging (the only exception is if you want your tank commander popping out of the tank or not). Minimum drimmeling was needed on the treads to help the model sit flat on the table and for some extra molding not easily clipped off. The resin model is extremely easy to assemble allowing you to get this monster on the battlefield fast. 


Final Thoughts


Overall, I am extremely impressed with the model of the Firefly itself and with the gameplay it provides. While it might not be the best at anti-infantry, it is definitely a force to be reckoned with in Tank Wars. If you ever plan on playing Brits, pick one of the Sherman Fireflies up.

As always, leave comments and questions below, and may the dice gods be in your favor!

Another Introduction

Hey everyone, my name is Nick and I am an avid war gamer, behind school of course. A little bit about me, I am in school, so I do not have the time to play wargames everyday but I do try to play at least once a week. So let's learn a little bit about my table-top history and armies.

I started playing Warhammer 40k during 6th edition. I was in Texas and walked into a local Games Workshop, not knowing what it was, with my dad and immediately told him that I had to get into wargaming and play with toy soldiers and armies again. From there I bought a Dark Vengeance Starter set and that kicked off my table-top career. With the (then) recently released Dark Angels Codex, I amassed about 3,000 points of Dark Angels. I played them for a while and enjoyed it but it still did not feel like an army I wanted to keep playing, so, as a wargamer, researched the armies out there some more and came to my main force: Tau. I have maintained and played the Tau for about a year and recently decided that I should jump on to the Space Marine fun. I picked up Blood Angels and have enjoyed playing them (even though I lose every time). With the new Dark Eldar release, Andrew and I decided that since we do not have a Dark Eldar player I should start and I have started collecting them now too. 

I also play other table-top games: Bolt Action, Warmachine/Hordes, and Malifaux. I play the British in Bolt Action and Tank Wars; Protectorate of Menoth, Retribution of Scyrah, and Legion of Everblight in Warmachine/Hordes; and the Resurrectionists in Malifaux. 

As Andrew stated, this is a blog about table-top gaming. If you have any questions, comment below, and may the dice gods be in your favor!

Unit Review: Grey Knight Purifiers

Grey Knight Purifiers

The Order of Purifiers of the Grey Knights operate and act very differently from the rest of their battle-brethren. Characterized by their strict nature and traditions, they are charged with protecting the Chambers of Purity deep within the Chapter's monastery on Titan. These vaults in Mount Anarch can only be accessed by Grand Masters which makes the Order of Purifiers the last line of defense in the event Titan ever came under attack.

Assembling Purifiers for Warhammer 40,000
As is my first complaint about any of Games Workshop's kits -- especially those dealing with elite factions like Marines -- there tends to be a ton of extra bits that'll most likely be collecting dust. GW molds are great and there is some amazing detail in them, but I have no idea what they expect you to do with all the extra crap to cut out from those sprues. That aside, the new Codex for Grey Knights now ensures that you won't always be seeing psycannons in Purifier squads anymore.

Thoughts on Purifiers in Warhammer 40,000
They are certainly not as valuable as they used to be. Now that there's no option of taking Purifiers as troops anymore, it's likely you won't be seeing them as much. Psycannons are still terrifying, but now that their range has been reduced by half its likely you'll be seeing more incinerators and and psilencers. However, if you want more mobile and resilient troops it'd probably be more advantageous to look at Interceptors or Terminators (considering Terminators are much more cost-worthy than they used to be).

Sunday, October 12, 2014

Unit Review: German Panzer V, Panther

Panzerkampfwagen V Panther

The German Panther is one of the Third Reich's most recognizable vehicles of the mid and late war era of World War II. Originally designed as a counter to the Soviet's T-34, it became a solid partner for its heavier hitting Tiger cousins. Panthers were an excellent combination of anti-tank firepower, mobility, and protection and set a high bar for future Allied tanks that would eventually go on to even influence designs of post-war armored vehicles. Rushed into combat in 1943, the Panther's career would go on to be characterized by always fighting outnumbered, downhill battles thereby hampering its maximum possible battlefield potential. By the end of World War II, an estimated 6,000 Panthers had been completed in comparison to nearly 85,000 T-34s and 50,000 Shermans.

Assembling a Panther for Bolt Action
Warlord Games produces an amazing plastic kit for the Panther ausf A through Italeri. It is bare minimum and assembles exactly what you want: a single Panther ausf A without any extra pieces that make the infamous bells and whistles of Games Workshop sprues. So no need to organize all those useless bits you'll likely never open again! When I was starting off my German Panzer Division, following the announcement of Tank War, a plastic Panther kit was the first thing I picked up.

If you have any plans investing into Tank War, I highly recommend perusing through Warlord's model range to see if there are plastic kits for the tanks you're looking for. They are light, easy to assemble, and very sturdy. The molds have great detail -- exactly what you'd expect if you have a company like Italeri handling your plastics!

Thoughts on the Panther in Bolt Action
The Panther is a solid choice for German Panzer Companies or as a vehicle to have to support your Heer or Waffen-SS in a standard Bolt Action game. Possessing a heavy hitting anti-tank gun, the Panther is capable of making short work of enemy vehicles and its sloping frontal armor ensures a level of survivability that the Panzer III and Panzer IV does not possess. It is, however, expensive for its points -- something very important to take into consideration. If you're likely going to be fighting in a regular Bolt Action game, it's probably a better idea to invest in something else.

Saturday, October 11, 2014

Unit Review: British Cruiser Tank, Comet I

Tank, Cruiser, Comet I (A34)

The British Comet I was a type of Cruiser Tank that was fielded by the British near the end of the Second World War and was characterized by its very close appearance to the Mk VIII Cromwell Cruiser Tank. However, unlike its predecessor, the Comet I possessed heavier armor and an intimidating variant of the well-known Ordnance QF 17-pounder made famous by the Sherman Firefly. The sacrifice in speed between the Cromwell and Comet was considered negligible. It's late entrance into the war in Europe -- December 1944 -- meant that the Comet I did not play a role in any major engagements before the surrender of the Third Reich. It did, however, participate in the Crossing of the Rhine and the Victory Parade in Berlin that took place in July 1945.

Assembling a Comet I for Bolt Action
Warlord, unfortunately, does not yet have a kit for the Comet and there currently exists no model for the Comet that fits the 28mm (1/56) scale that matches Bolt Action. What I ended up having to do was build one using two different Bolt Action kits already on the market which was the plastic Cromwell (an amazing model, by the way) and the current resin Sherman Firefly.

Originally, I had plans to construct the final Comet I turret out of plasticard. This proved to be a little too ambitious when taking into account my skill-set for conversions and working with plasticard. What I did instead was do research on images of the Comet Prototypes which -- as far as my research took me -- looked very much like Cromwells armed with the OQF 17-pounder; a considerably easier job than the one I originally had in mind.

As this was a birthday gift for my friend who plays the British, I am pleased with its aesthetic appearance to the Comet Prototypes, but equally horrified in what I have just added to my opponent's arsenal.

Thoughts on the Comet I in Bolt Action
It plays very similarly to the Panther. In fact, it's very much the British mirror to the German Panther in both armor and armament. All around, it's a great vehicle -- it's lower visual profile makes it a scant bit harder to hit based on line of sight. I imagine once Warlord comes out with some variant of a Comet kit, we'll be seeing a lot of 'em in Tank War.

The Battle of Chambois: A Bolt Action Battle Report

Since the release of the Bolt Action expansion titled Tank War, my friend Nick and I have been highly anticipating the cinematic look and experience of World War II armored combat. While this is not our first official game of Tank War it is the largest so far and the first game we've played in which we fully understood all of the ins and outs and little nuances of the game.

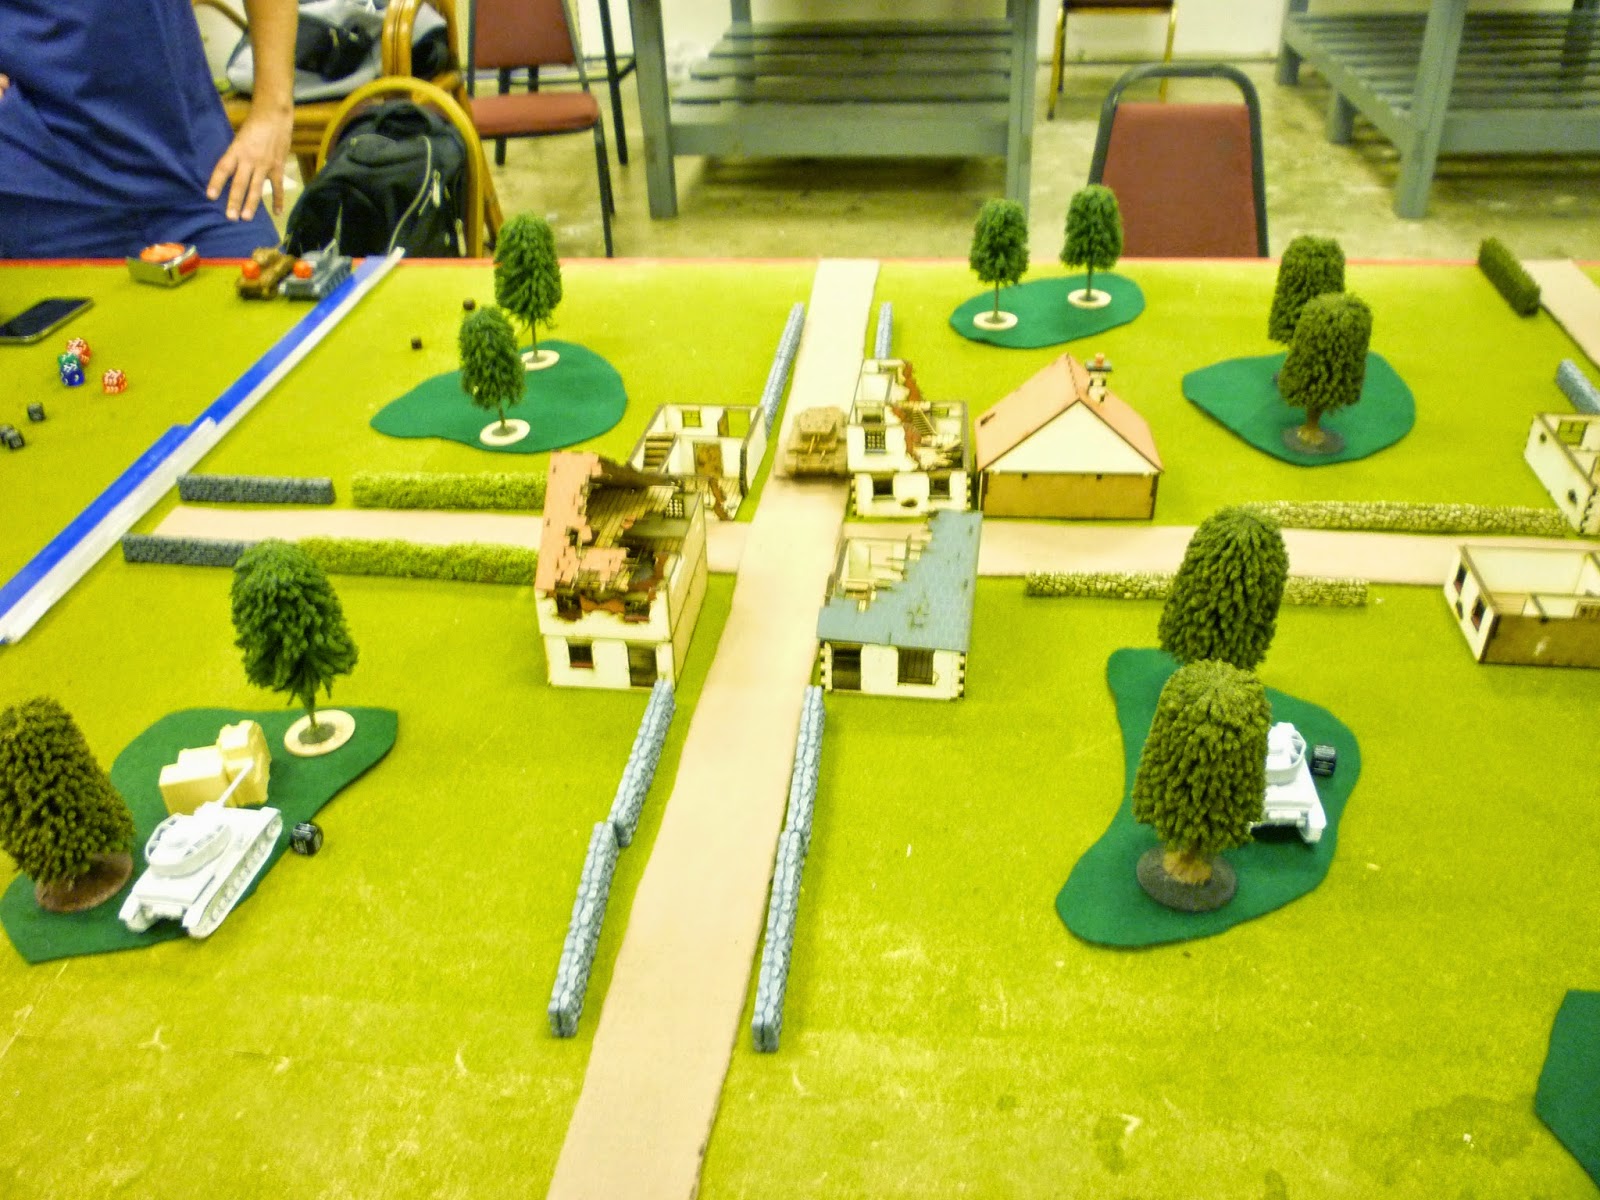
The table -- cinematically set up to appear like a small town in the French countryside -- was a whopping 4.5' x 9' that was balanced for each side. Setting up the scenario, we decided on playing off of objectives instead of a straight up slug-fest and -- out of a possible D6 objectives -- rolled a measly two. On such a large table, it would ensure that seizing an opponent's objective would come down to the wire.


* * *
Scenario
Preceding the D-Day landings, Allied Forces launched a massive airborne operation in order to help ensure the success of the eventual amphibious attack. Hundreds of American, British, and Canadian airborne troops were paradropped behind enemy lines along with various equipment and crates of ammunition and supplies.

A supply drop -- which missed its target by several kilometers -- has landed outside of he countryside town of Chambois. British forward armored brigades have been tasked with securing these supplies in order to help continue the Allied push into Normandy. However, rumors of a nearby Panzer Division have them proceeding into the combat zone with caution.


* * *
Forces

92nd Guards Armored Brigade "Welsh Guards"
Under the command of Nick Billings, the forces of the 92nd Guards were among one of the first fresh units to arrive in Normandy following the successful landings at D-Day. Proceeding south, the 92nd forms the spearhead of the British and is equipped with a number of Cruiser tanks to help quicken their advance. Their line-up includes the prototype of the Comet I Cruiser Tank.

- Tank, Cruiser, Comet Prototype (Command Tank)
- Tank, Cruiser, Mk VIII, Cromwell
- Sherman VC Firefly
- Sherman V
- Tank, Cruiser, Mark VI, Crusader

Force Total: 1,097 Points

503rd Waffen-SS Panzer Divison
Since the start of Germany's Operation Barbarossa the 503rd has been fighting for the Fatherland in the harsh winters of the Russian front. In those three years, command of the division has changed hands numerous times and is currently lead by Andrew Malic. The division consists of a number of veteran tankers, but the late war has taken a toll on German military power forcing it's brigades to field whatever is available to them.

- Jagdpanther Tank Destroyer
- Panzer V, Panther ausf A (Command Tank)
- Panzer IV ausf H
- Panzer IV ausf H

Force Total: 1,100

* * *
Turn One: Arrival
The speed of their cruiser tanks allows the British to take to the field of battle first. The Welsh Guards' Mark VI Crusader Cruiser Tank arrives on the battlefield from the southwest and moves to quickly take the ammo crates on the town's south side. The nearby creek provides a sufficient obstacle to curtail a quick German response.
Quickly following the British deployment, a Panzer IV of the 503rd arrives on the battlefield from the northeast to secure the other supply crate outside of Chambois. With each objective secured by the other, the game has come down to a race across the battlefield.
The remainder of the turn sees the Sherman V of the 92nd arrive to reinforce the Crusader as another Panzer IV arrives -- again -- from the northeast. The final move of the turn sees the Mark VIII Cromwell Cruiser Tank come barreling down the east side road from the south to confront the forming German armor line.
The end of turn one sees no exchanged fire. Long range shots are hindered by forests and buildings, but the distant sounds of rumbling engines ensures both sides that their opponents are close.

* * *
Turn Two: Shots Fired
The 503rd takes the first shot when its Jagdpanther arrives in Chambois from the opposite side of the Cromwell. However, the quick speed at which they drive into the town forces a missed shot with their main cannon. The Cromwell responds in kind, but its medium AT shell bounces off of the Jagdpanther's front armor.
The Firefly, boasting the powerful British-made OQF 17-pounder gun, makes its appearance from the southeast. Taking steady aim, the crew of the intimidating Sherman VC takes the tracks clean off the nearby Panzer IV ensuring that the German tank is stuck in its position.

The Welsh Guards bring their Comet Prototype onto the field, backing up their currently deployed forces in the southwest. Unfortunately, no line of sight can be drawn to any German tanks and the Comet's 77mm HV remains silent for this turn.

In response to the imposing gun sported by the Firefly, the 503rd moves its Panther into position -- but its shot misses the target by centimeters.

The close of the second turn sees all tanks are now in play and an objective secured by both sides.

* * *
Turn Three: First Blood
Utilizing their reload time to come to a halt, the Jagdpanther's gunner takes steady aim at the enemy Cromwell in his sights. A loud report comes from the tank destroyer's 88 mm Pak 43/3 L/71 gun and renders the Cruiser tank inoperable. Knowing their vehicle is out of commission, the British crew quickly abandons their tank and departs the battlefield to the south.

The 92nd responds to the loss of their forward scout in the southeast by reforming their western forces to begin proceeding east. The Comet attempts a very long range shot on the Jagdpanther, but is unsuccessful in landing a hit.
The Sherman V proceeds down the main street and fires a shot at a close Panzer IV, but fails to penetrate. The Germans attempt to return fire, but to no avail -- the 75mm shell flies harmlessly over the Sherman's turret and into the French countryside beyond.

The Firefly once again takes a shot at the same target as its last round and manages to force the Panzer IV crew into a stunned state, preventing their action for this round.

The Panther responds in kind and manages to inflict minor damage to the Firefly's front armor.

* * *
Turn Four: The Battle Rages
The German Jagdpanther advances further into the town and onto the main street to take a shot at the 92nd's Sherman V. The round punches through the vehicle, wrecking it, and forcing the British crew to abandon it soon after.
The loss of two vehicles has now forced the British onto the defensive as the Comet takes a long-range shot at the Panther across the battlefield, failing to make contact. Using the village buildings as cover, the Welsh Guard's Crusader proceeds east through the city.

Once again the Sherman Firefly and Panther exchange shots and both crews gawk in disbelief as their shells once again fail to penetrate.

Startled by the power of the OQF 17 pounder, the crew of the immobilized Panzer IV fails to muster enough courage to act as the other Panzer IV begins its run south towards the British held objective.

* * *
Turn Five: A Lull in the Storm
With the Firefly effectively pinned down by heavy AT fire from the Panther and nearby immobilized Panzer, the remaining forces of the 503rd begin rushing west to secure the second British objective.

The Crusader takes a shot at the side armor of the Jagdpanther, but does not make contact. The remainder of the turn is surprisingly silent as the battle draws closer to its conclusion.

* * *
Turn Six: An Unexpected Turn
Attempting to use their forward momentum, the 503rd Waffen-SS Division continues to move west at speed. Only the Jagdpanther halts to make a shot against the concealed Comet to no avail and ignoring the light Crusader tank behind them.

A grave mistake.

Taking his time to aim his shot carefully, the gunner of the Crusader fires off a round from the tank's 40mm QF 2 pdr gun. It rocks the Jagdpanther and the engine catches on fire. With no time to react to the spreading inferno, the Jagdpanther crew is forced to abandon their burning tank.

* * *
Turn Seven: Battle's Close
Surprised by the loss of their best vehicle, the 503rd's Panther Command Tank rolls away from the Sherman Firefly facing it and turns its main gun eastward towards the Crusader. With a single round, the vehicle eliminates the British light tank at the same time the immobilized Panzer IV forces the Firefly crew to abandon its vehicle.
Unfortunately for the German 503rd, the final turn puts them just out of reach to claim the second objective and the battle draws to a close.

* * *
Conclusion
Battle Result: Tactical Draw
Although the 503rd Waffen-SS Panzer Division was successful in inflicting serious casualties to the opposing 92nd, imminent Allied armored forces fresh from the Normandy beachhead would be arriving within the hour. Desperate to maintain their current strength, the 503rd decided to withdraw instead of pushing for the second supply drop.

Even with four vehicles out of commission by the battles close, the fact that the chassis remained superficially intact guarantees that with some repairs they will quickly return to front-line service. The 92nd ability to hold the Germans back from the supplies in Chambois have won the Allies a long-term victory.